 |
| Our finished farmhouse wallpaper lightens up walls behind the bed and sofa. |
Adding decorative touches to a space is something that I have loved as long as I can remember. As a child, I spent hours making paper snowflakes to hang from the ceiling of my room to create a "winter wonderland" theme. I am no longer in the business of making snowflake scenes, but I love decorating all the same. How can you make customize your RV with little time, effort and money? I'm going to show you how to add a little farmhouse flair to your RV that anyone can do!
I used some adhesive paper to update
Peggy Sue's door for about $10 and thought that it was an excellent way to add color and achieve a new look. I received lots of compliments on the end result. Given the ease and the finished product, I decided to try the same thing in our new RV.
 |
| The cozy bedding and reading lights add plenty of style to the area for rest. |
Decorative paper comes in so many different patterns, colors, and styles. You can select any style that works for your personal taste. I like the simple, neutral palette of farmhouse decor. I selected a
shiplap style paper for our new living space.
Pick a wall(s) or section of your RV where you want to make an impact. I choose to update the wall behind our sofa. Since we have a Murphy bed, I covered the wall behind the bed as well. You could do this as a backsplash or around and island too. Measure your space and order the adhesive paper accordingly.
 |
| Cut the paper using the grid on the backside of the paper to help you make straight lines. |
 |
| You will only need basic tools like scissors, screwdriver or drill, measuring tape, and your wallpaper. |
Other tools that you will need for this job are:
- Drill and/or screwdriver to remove items from the wall if necessary. I found a drill worked best.
- Tape measure
- Scissors or a sharp blade for trimming
- smoothing tool
This project is straightforward. Remove anything from the wall that is necessary to give you a clean smooth surface for working. Be sure to clean the surface so that nothing is on the wall that would keep the paper from adhering. Allow the surface to completely dry if you are using spray cleaners to prepare the surface.
Before you start working with the paper itself, consider if your wall is flat or curved. Flat walls are easiest. You can work in horizontal or vertical rows with a flat space. Curves will complicate the project. Many times campers have curved walls behind a bed. This will almost certainly require you to work in vertical rows. Your measurements for cutting will be affected by how you work your rows.
Measure out the paper to cover the first full row. Begin to place the paper by starting at the top corner and working in small sections down and across. As you remove the back paper, smooth each small section with your smoothing tool.
 |
| Measure the space on your wall to help you gauge how wide to cut your paper. |
 |
| Work in even rows. |
When you get ready to start the next section, line up the new piece with the one you have already placed. The shiplap style paper makes this easy because you can use the guidelines of each piece to do it. I recommend a little overlap between the two pieces. Work in rows until you cover the entire wall.
If you have odd items like light fixtures, you can remove them or work around them. This can create more of a challenge. My school teacher days came in handy when working around my light fixtures. I removed the fixtures from the wall with a drill. Next, I made little notches or slits to create an opening to slide the light through. I finished placing the paper down the wall using a smoothing tool. When I was done with that section. I replaced the fixture. The place where I cut into the paper for the fixture is totally concealed behind the fixture itself.
 |
| Behind the bed, I removed the lights and cut notches in the paper to go around the light. |
 |
| Replace the light after you are done. The smoothing tool completely eliminated these little bubbles after I was done. |
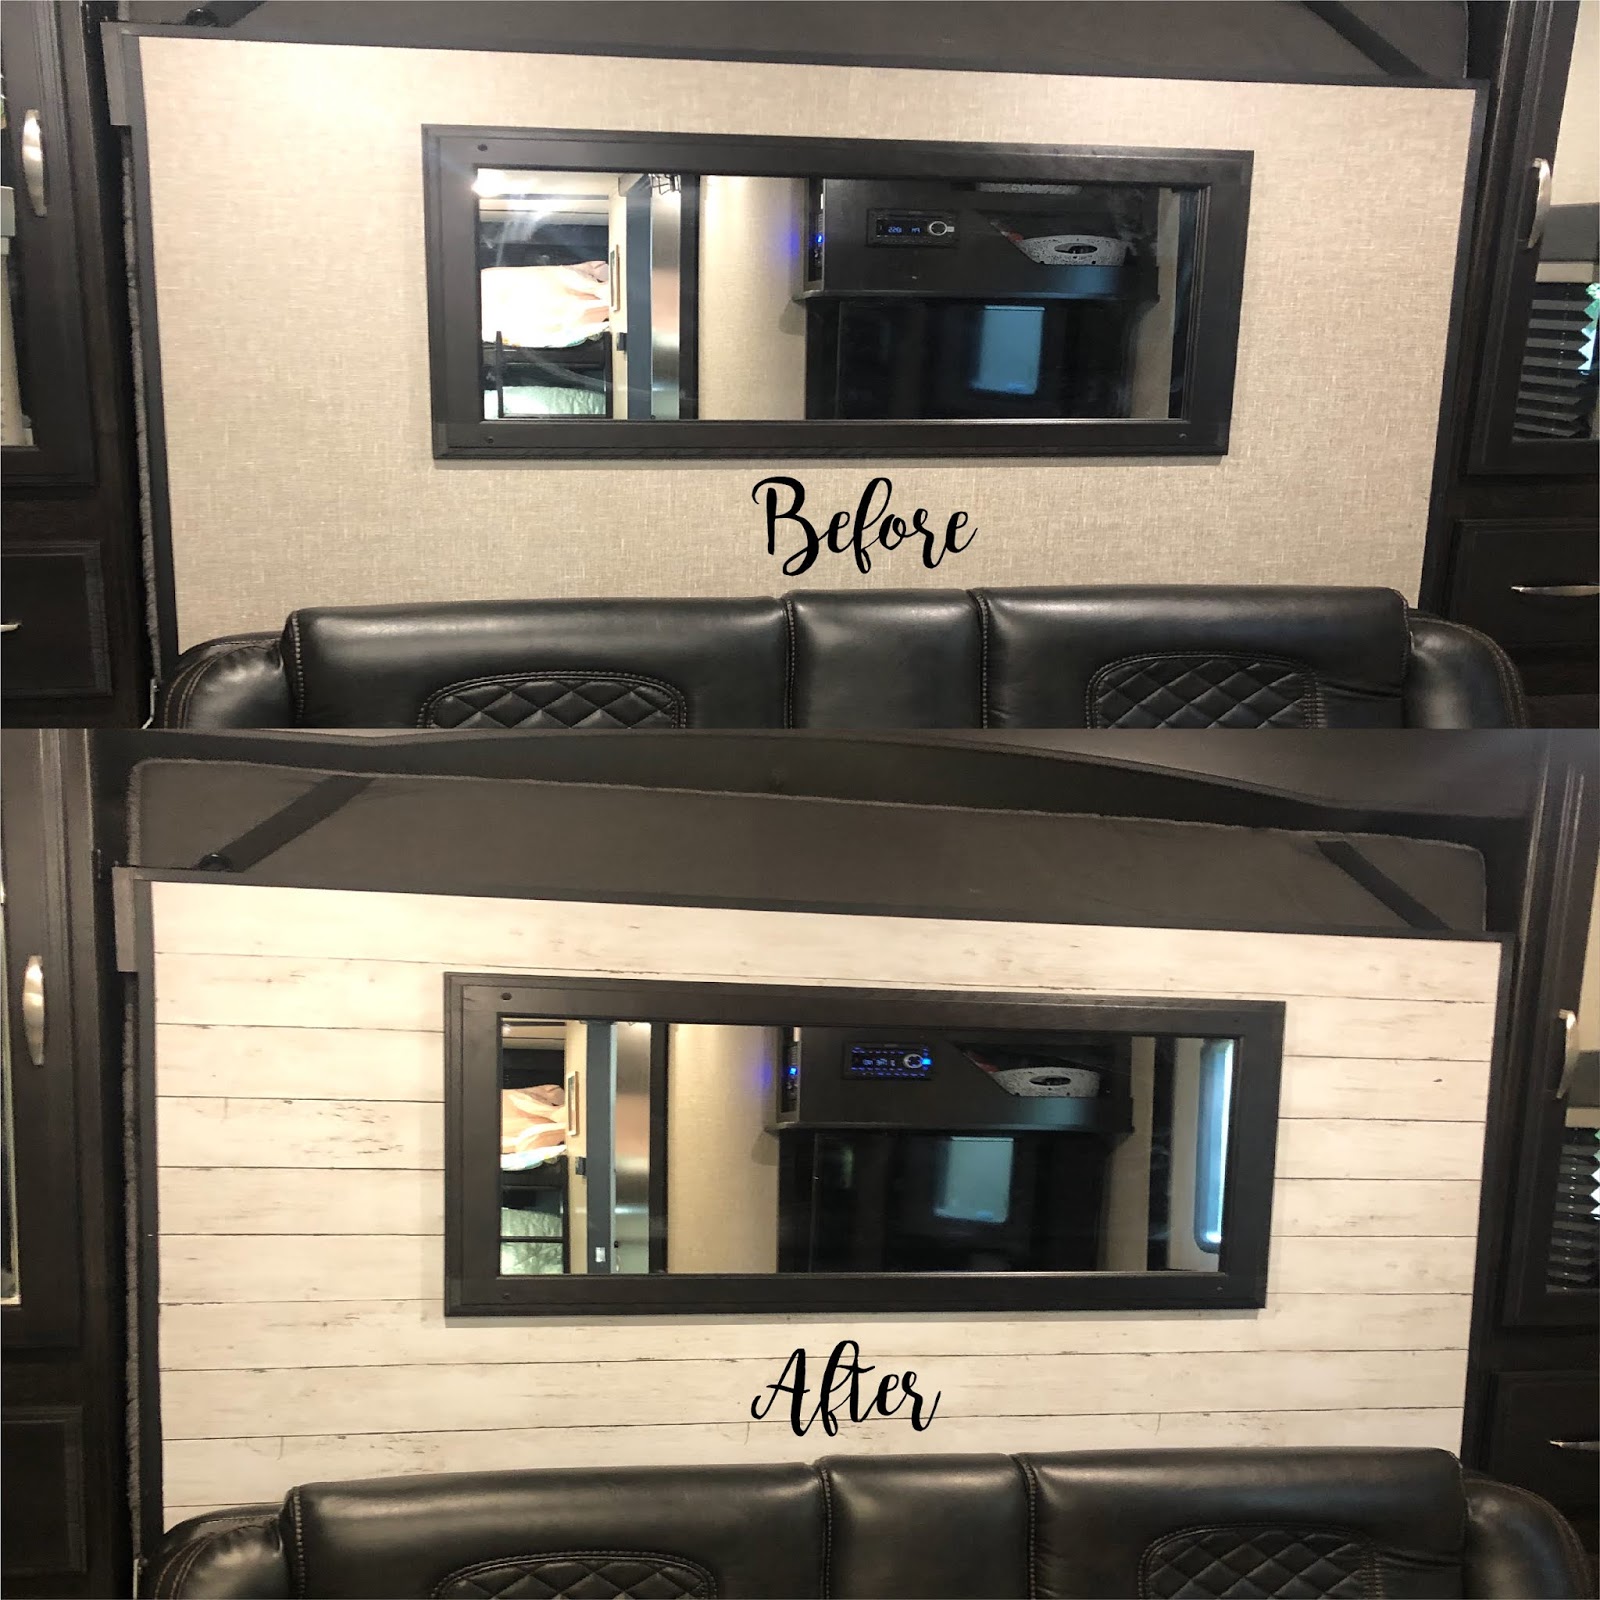
On top of the wall behind the bed, I had a bit of a challenge. The wall was curved. I could not install the paper horizontally. I had to do a vertical stripe on this portion of the wall. You can see that I did a horizontal stripe behind the sofa and a vertical one behind the bed. This is not a deal-breaker because these two patterns won't be seen side by side. But, consider that curves in the wall can impact your installation.
 |
| The before and after behind the bed. |
 |
| The finished product behind the sofa. |
After I replaced everything and covered all of the sections, I went over the walls again with my smoothing tool. Be sure to carefully trim any excess from around all of the edges. Also, if you find that you have any places where you need to patch, you can do so with this pattern. Just cut the paper patches in strips or pieces that align with the paper. These patches will disappear and become invisible. This really is a foolproof project!
I love the finished result. It really makes a big impact in our small space and brightens up the living area. I did both wall sections for less than $30. And, I have some paper to spare if I decide I want to make a backsplash in our kitchen area with the same paper.
Until next time...
This post contains Amazon Affiliate Links.
 |
| Pin this to your favorite Pinterest Board. |


Post a Comment
Thank you for your feedback and comments. I always review before sharing with other readers. Have a great day!